Blog

MTJC: How did you get into papercrafts? CINDY: I started scrapbooking about 20 years ago with Close to My Heart. MTJC: Where do you get your inspiration: CINDY: When we travel or I go on day trips, I always stop at all craft stores, quilt shops, yarn stores an all scrapbooking stores. I just love to be busy making something. MTJC: What are you working on now? CINDY: I am trying to organize over 50 years of pictures and memorabelia, into something my grown sons will cherish (and not hide in a drawer) MTJC: What's next for you? CINDY: Presently, I am learning as many new techniques as possible.... I'm c urrently working on 2 Folios, learning to use gilding powder and flakes, and learning how to colour with Prismacolor pencils and more of an artist style of layering. MTJC: That sounds like a lot of fun! Can't wait to see what's next. Thanks, Cindy!

It was an interesting year, to say the very least! We learned new phrases - "6 feet apart", "wear your mask, wash your hands" and "speaking moistly"! lol We treasured people, not things, and truly learned to appreciate the importance of toilet paper! Original Design Team Member, Tracey Luscombe has created an album that truly reflects all of these concepts. I hope you enjoy her "Year In Review"
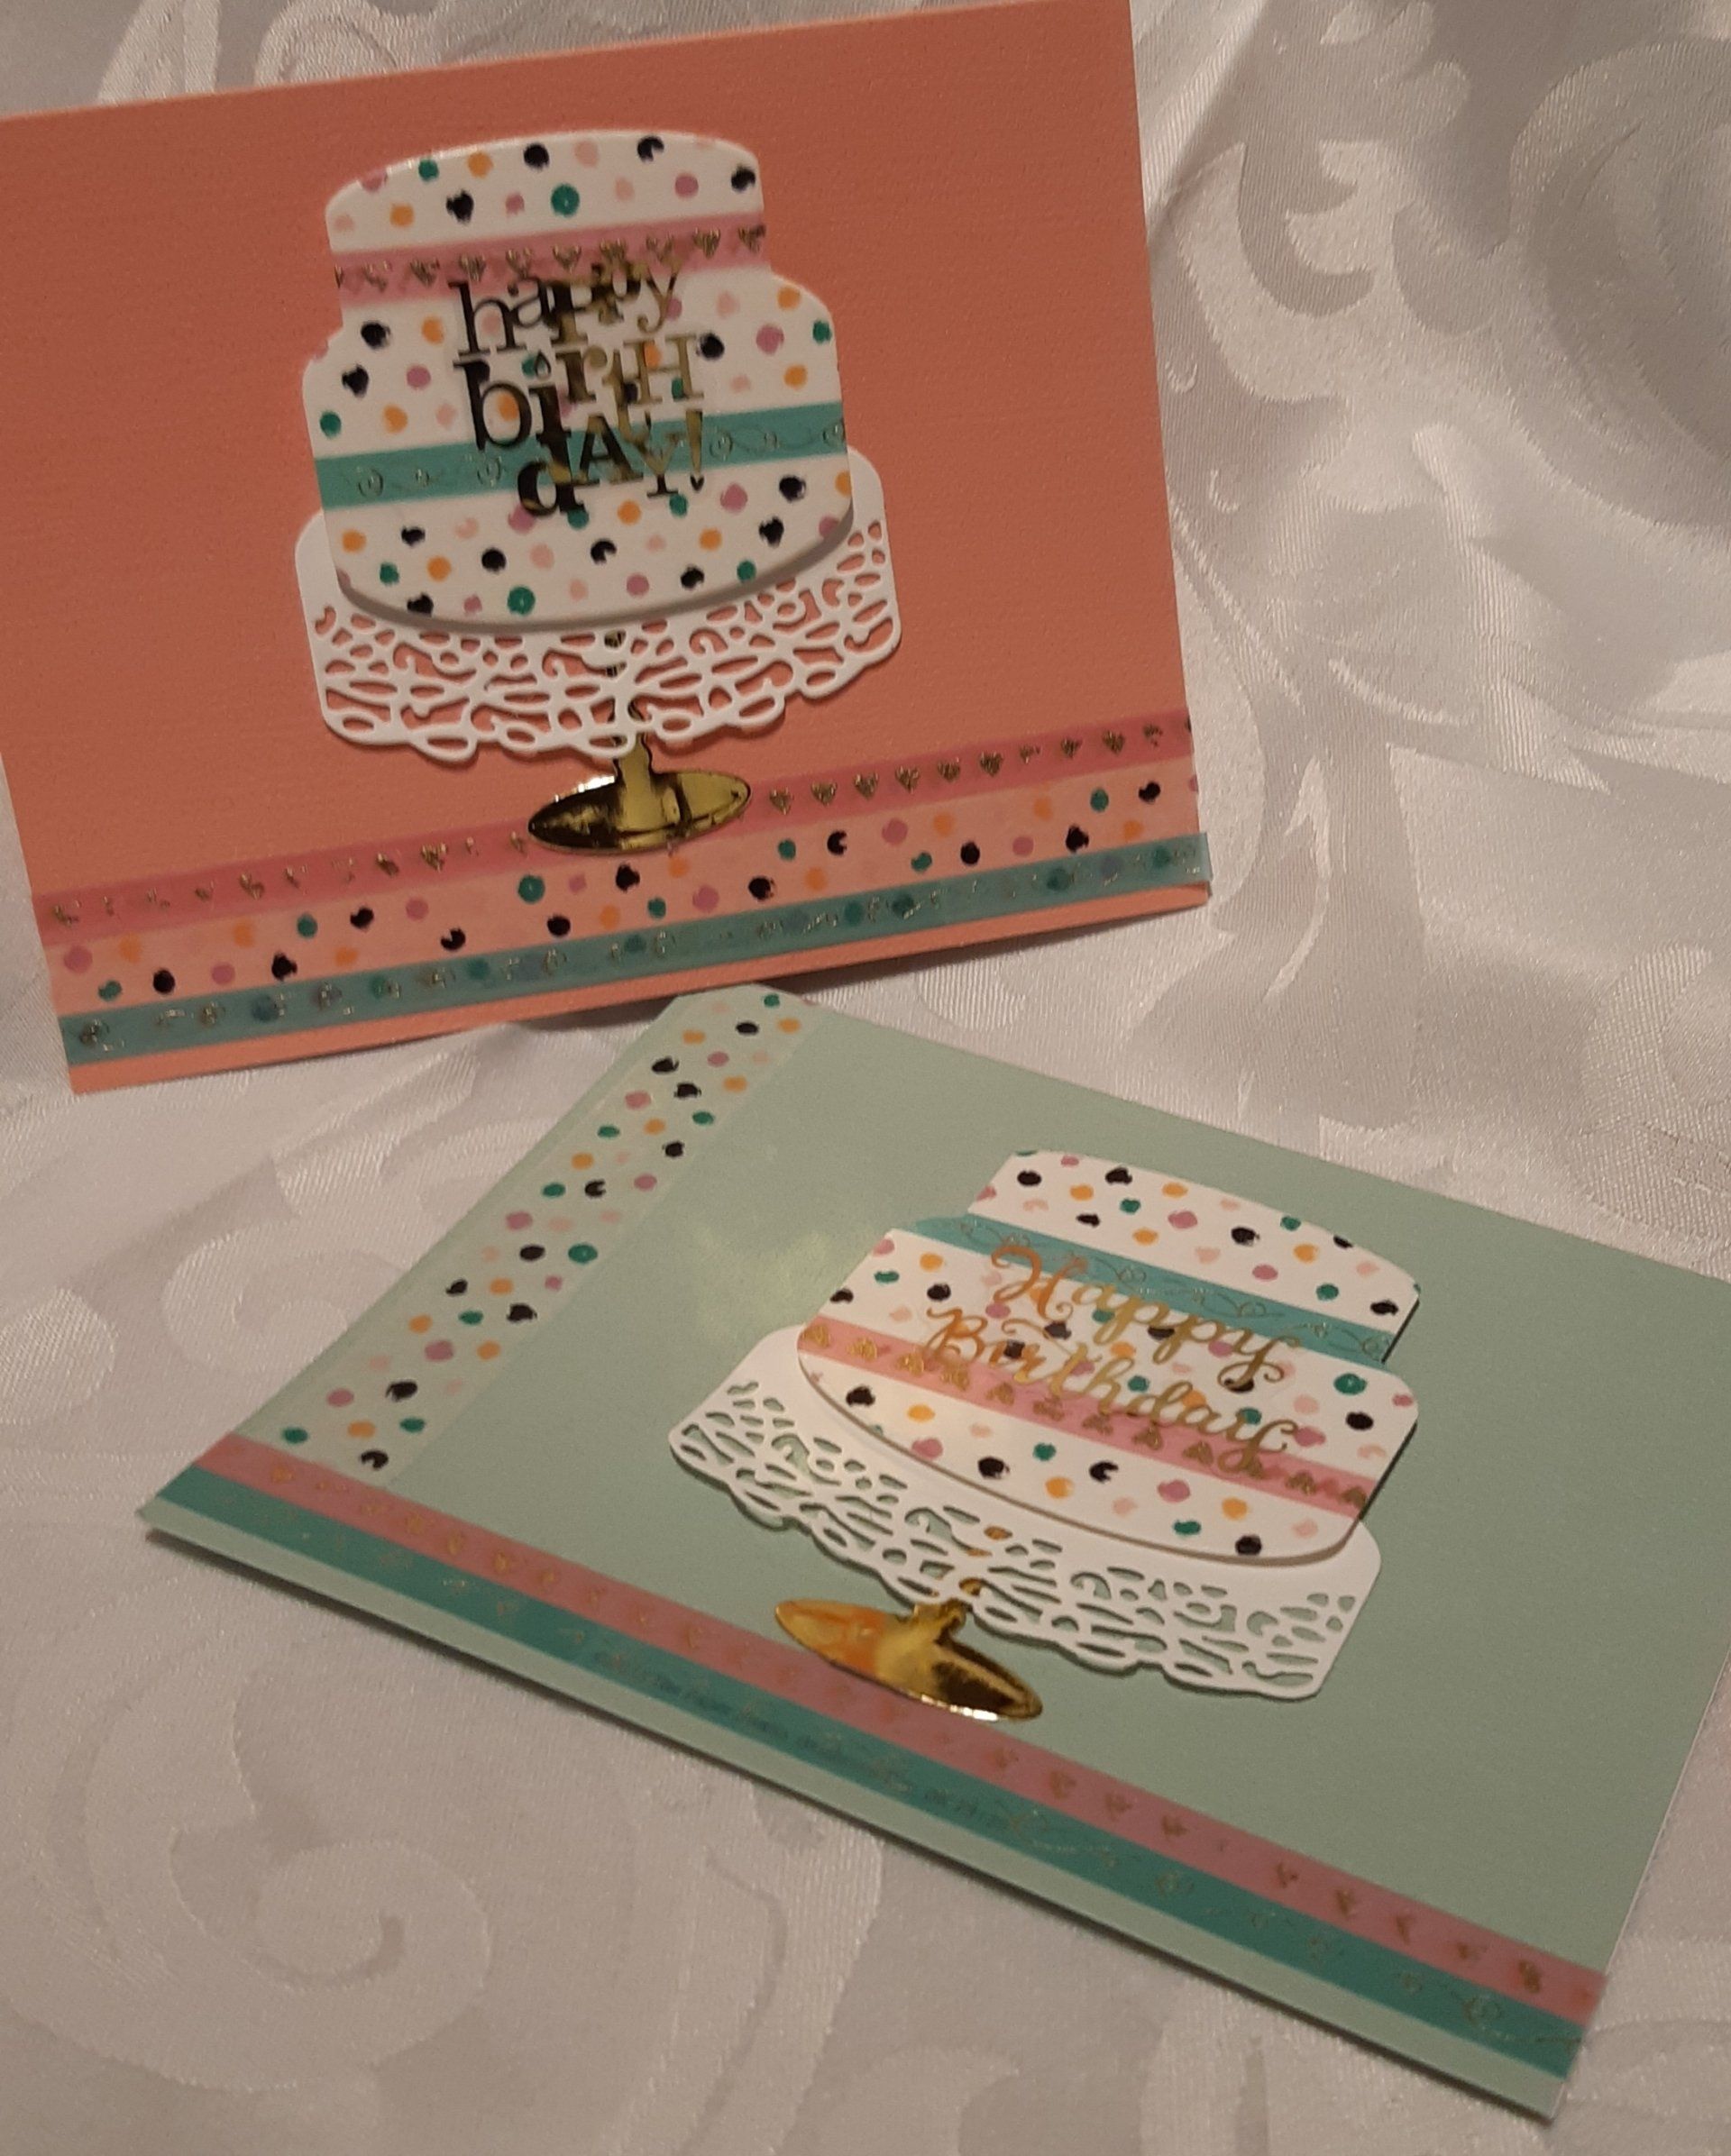
How many drawers of crafting supplies do you have? Ok, no, I really don't expect an answer! What's that old joke? "My husband says my crafting supplies have to fit in one closet, and I have to stop calling our house a closet!! " So, to start off the New Year, I went into my stash to make some quick birthday cards for my January birthday friends. I put some stickers and washi tape to good use. How easy is that? There are so many ways to use Washi tape. This time, I created a pattern on white cardstock, then used a cake die to cut it out. I followed through with the washi tape on the front of my card, and added the gold base for the cake stand to carry it through. Dig into your craft stash, and have a play! Supplies for Candle card: Card blank is 4.25" x 5.5" Patterned topper paper is 4" x 5.25" Zig Zag paper 2" x 5.25" (2 - second piece is for the inside) White banner to hold inside sentiment Stickers: I used "Blow out the Candles" for the front and "Make a wish" for the inside; two little gold banner ends To Make Candle card: Front: Attach candle paper to card blank; attach zig zag paper in centre; peel and stick "Blow out the candles" sticker Inside: Attach zig zag paper to centre of inside; attach white banner; peel and stick "Make a wish"; add gold banner ends
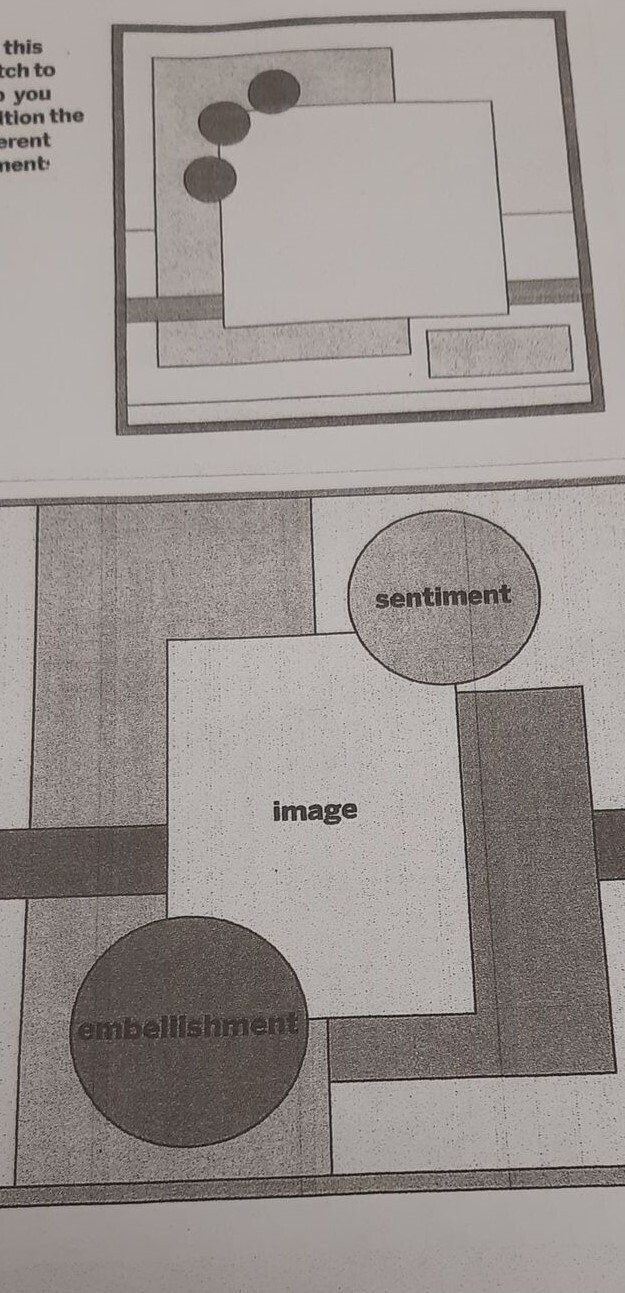
Designer Team Members Jeannette and Tracey have created these awesome designs for you! Also, we have a Bonus Designer, Susan Newland! This month’s challenge was to create cards or layouts from a sketch provided to them, using their stash materials. They used the sketch pictured above. Never used a sketch? They are an excellent way to get started on a Layout or Card. It gives you some placement ideas, and provides dimensional support for newbies, and experts, alike! I like sketches when I’m looking for inspiration – I’ll see a placement pattern that sparks an idea and away I go! Jeanette made some beautiful cards using this sketch. Here, she has followed the second sketch in the picture almost exactly. Stunning! This sketch has been altered slightly, with the sentiment circle being replaced by the bow and placed on the opposite corner. Such a small change, making a whole new picture! Tracey created two travel themed pages using the sketch. By following it as shown, she has created two pages that can be used individually, or side by side. Ready for photos from past adventures! Just fantastic, Tracey! Ahh, to travel again, sigh… This time, we are featuring a Bonus Designer! Welcome Susan Newland to our Design Team! Susan has created one of each – a card and a layout page using the sketch. Here, she has used the bottom sketch to create her layout page – can you tell from the picture there’s shiny silver washi tape? Susan has created a matching card using the sketch, as well. Such a pretty Santa in that picture! If you would like to learn how to follow a sketch to create fabulous layout pages or cards, join Coffee & Crafts on Wednesday mornings starting January, 6, 2021. Register at: https://www.morethanjustcards.ca/crafts-workshops-craft-kits-store/Coffee-&-Crafts Products used and available at More Than Just Cards: Susan’s Card: Mintay Papers – Santa, Frame & Background Susan’s Layout: Gnome for the Holidays Stamp.

I love stamping! it has been one of my favourite ways to create for a really long time. Here's the question: Wood or Acrylic Block? Which then leads to the question: rubber or photopolymer (clear) stamps? In my humble opinion, the rubber stamps give excellent detail with less "smushing" of lines. These are particularly well-suite for backgrounds, to use with heat embossing or to colour in with pencils or water colours, or what-have-you. Clear stamps, I find, allow you to line up your images; to layer them up. These work really well for lettering or positioning your images. So what's the answer? I like wood blocks with rubber stamps for really detailed stamping. I like acrylic blocks and clear stamps for the images or sentiments that I want to line up, layer up or just want to see where it's going. What's your favourite?
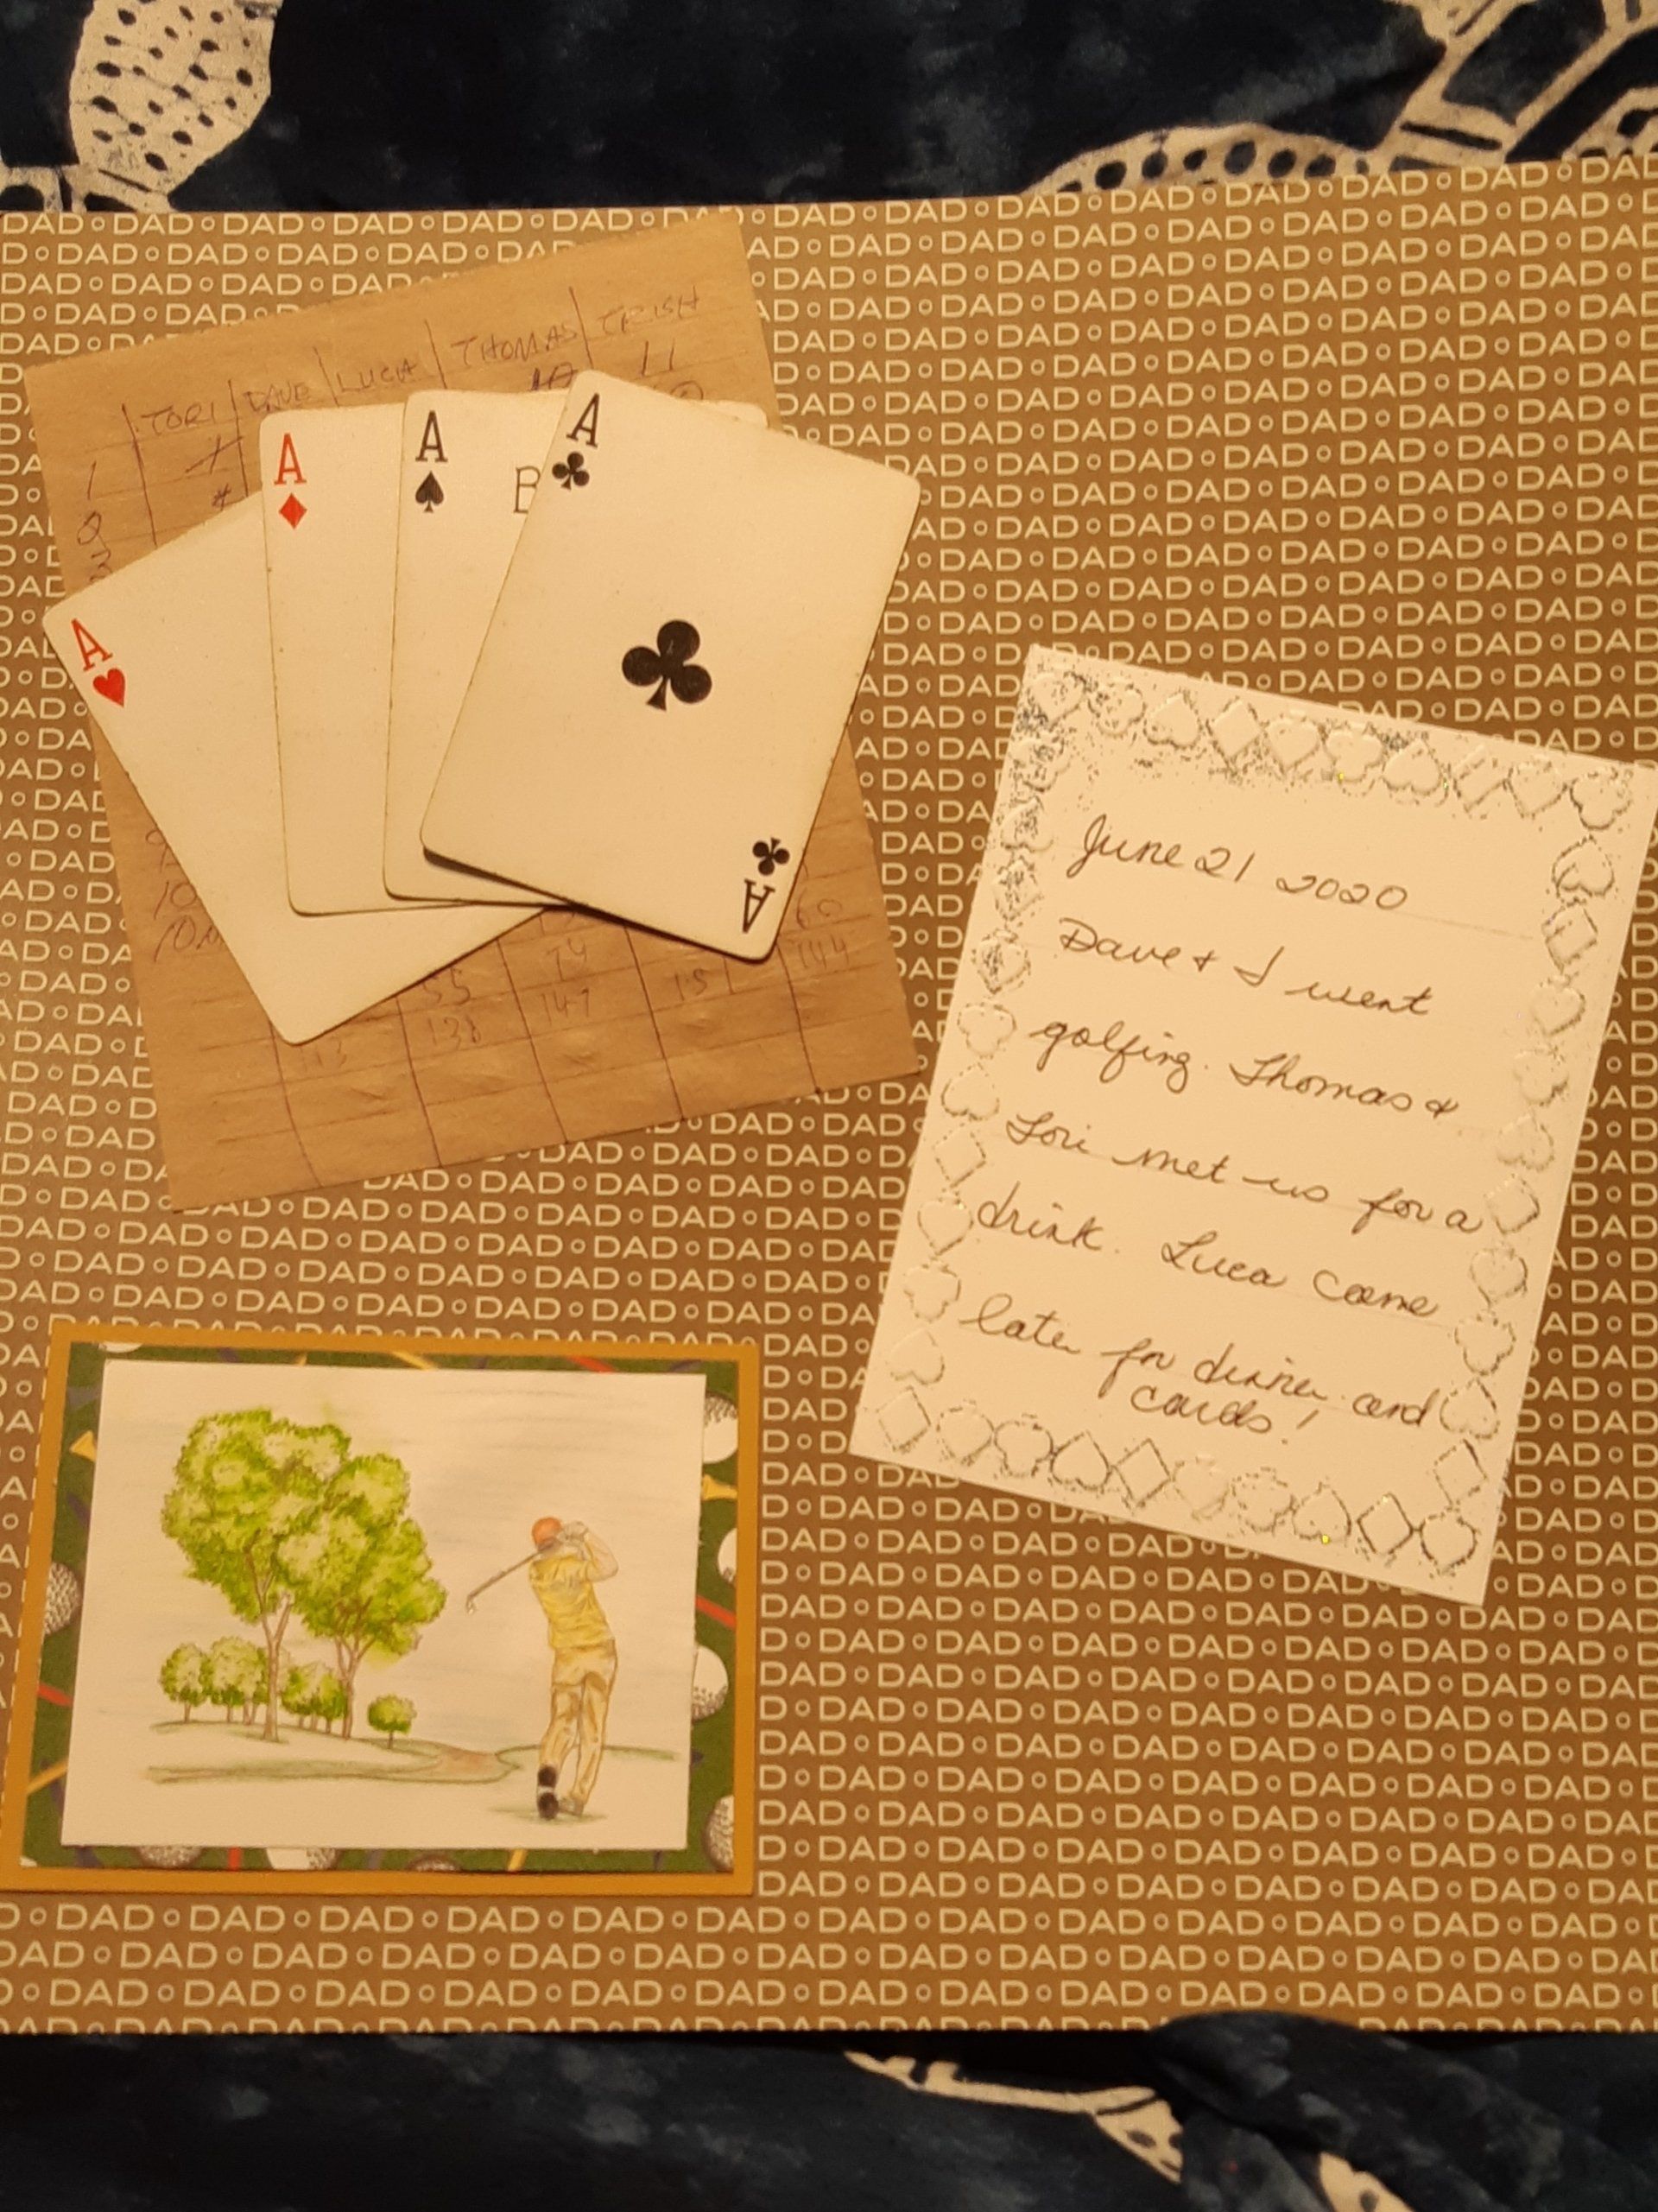
I did. I forgot to take pictures! So, I recreated the day without them! You could always add photos from other occasions, if you want. After all - it's the thought that counts! The best part of scrapbooking is the flexiblity it offers each person to create in their own way. Go ahead - try a picture free page! (you can tell everyone you did it on purpose!)
FAQ’s 1. Designers must have a Facebook & Instagram page and share the Design after it has been showcased on More Than Just Cards ( a blog is not required, but would be awesome!) 2. There are four design challenges scheduled for 2020. You must be available to participate in all four. Your location doesn’t matter! 3. Publishable photos are required of each design, to be delivered to More Than Just Cards on or before the due date. 4. Designers are to design and create an original card and/or layout page based on the schedule set out by More Than Just Cards. All items used in making the card or layout must be listed. No restrictions as to company! a. Cards: any size, more than one layer, must have embellishments b. Layouts – one or two pages, some layers and ephemera c. Sketch design: must be followed for that challenge. d. Product challenge: Any products provided must be used prominently. Any remaining products are property of the designer. Products will be shipped to the Designer from More Than Just Cards at no cost to the Designer. 5. Prizes are awarded to Design Team contestants based on creativity and quality as decided upon by the More Than Just Cards judges. Their decision is final. Prizes will be products, not cash. Shipping the prizes will be paid by More Than Just Cards.
Yesterday, I went up to visit a wonderful friend, whom I don't get to spend as much time with as I would like. She's a self-proclaimed "nomad", so when she's in one place for any length of time, I do my best to get together with her. If you're a crafter, you will understand that I took my latest project with me; and I brought along an extra project for my friend! We spent the afternoon, chatting and crafting - my favourite way to spend a day! This picture shows the results of our afternoon. Quite productive, don't you think?
It's not from the big box store - the instructions are in plain English, with photos! I love putting together craft kits, don't you? There's something so satisfying in pulling out all the pieces, putting them in order, and then proceeding to create something. Puzzles, Lego's, anything like that has that same gratification. From the earliest years, we see it in the children when they put the pieces into the shape sorter. Next up? Halloween Treats!